Create a Conversion Funnel
The most impactful way to utilize the events emitted from Transact is to create a conversion funnel. This guide shows you how to create your first funnel using the tools of your choosing, thereby gaining visibility into the journey your customers go on as they move through the Atomic flow.
- We'll start by setting up a listener for the interaction events emitted by Transact so that data can be captured in your system.
- Then, we'll identify the primary points of the flow which you'll want to capture.
- Lastly we'll make some recommendations for best practices when creating a funnel.
Set up a listener
If you are utilizing an analytics platform such as Google Analytics , Mixpanel, or Posthog, you will want to ingest all of the events emitted by Transact and use your platform to create the funnel.
Setting up the listener only takes a couple of steps:
- Add a listener to your Transact configuration which handles the
onInteractionevents emitted from Transact. - Create an async function to make an API call to send the interaction events to your analytics platform.
Transact event listener example
This example is simplified for readability. Use this snippet wherever you are launching Transact, along with any additional listeners or configuration parameters.
  import { Atomic } from '@atomicfi/transact-javascript'

  Atomic.transact({
    // your Transact config params here...

    onInteraction: async (interaction) => {
      await sendAtomicEventsToAnalyticsPlatform(interaction)
    },

    // the rest of your config params...
  })
Choose your events
There are waypoints along the journey through Transact's UI which you will want to capture, e.g. initializing Transact or viewing the success screen.
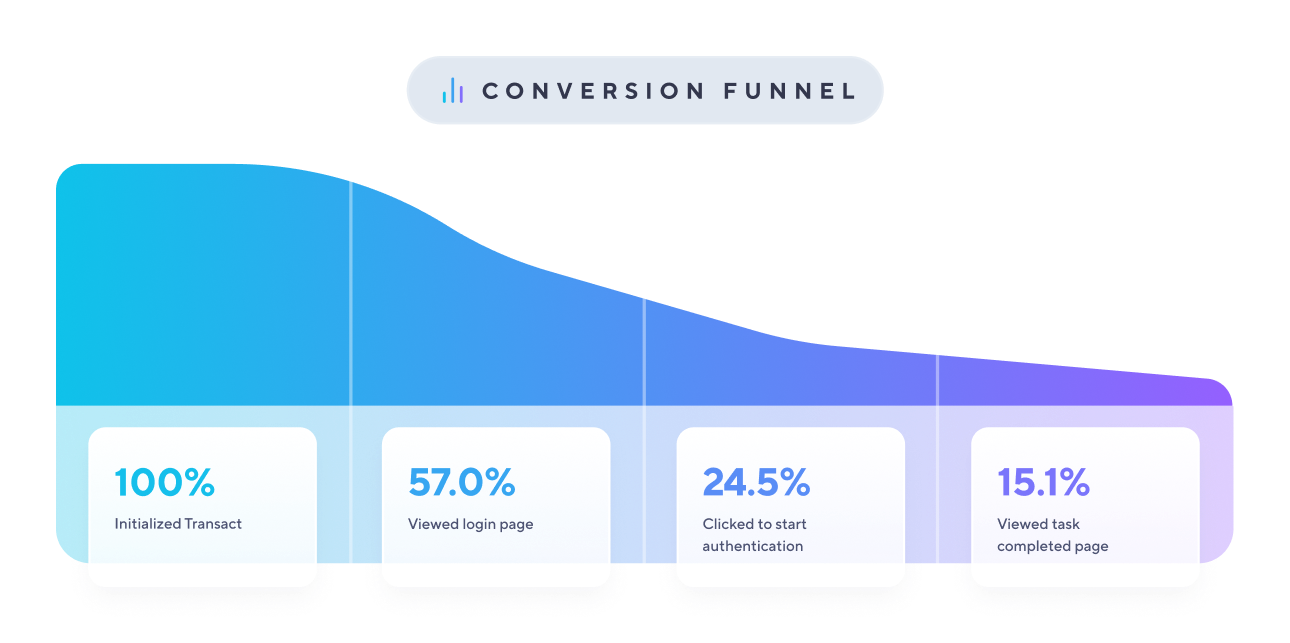
For your first funnel, we recommend creating a simple conversion funnel limited to a small subset of events such as:
Initialized TransactViewed Login PageClicked Button To Start AuthenticationViewed Task Completed Page
This will give you a good overview of the flows users go through as they make their way through the Transact UI:
- Launching Transact
- Selecting an employer or payroll system
- Entering their credentials to start authentication
- Successful task creation
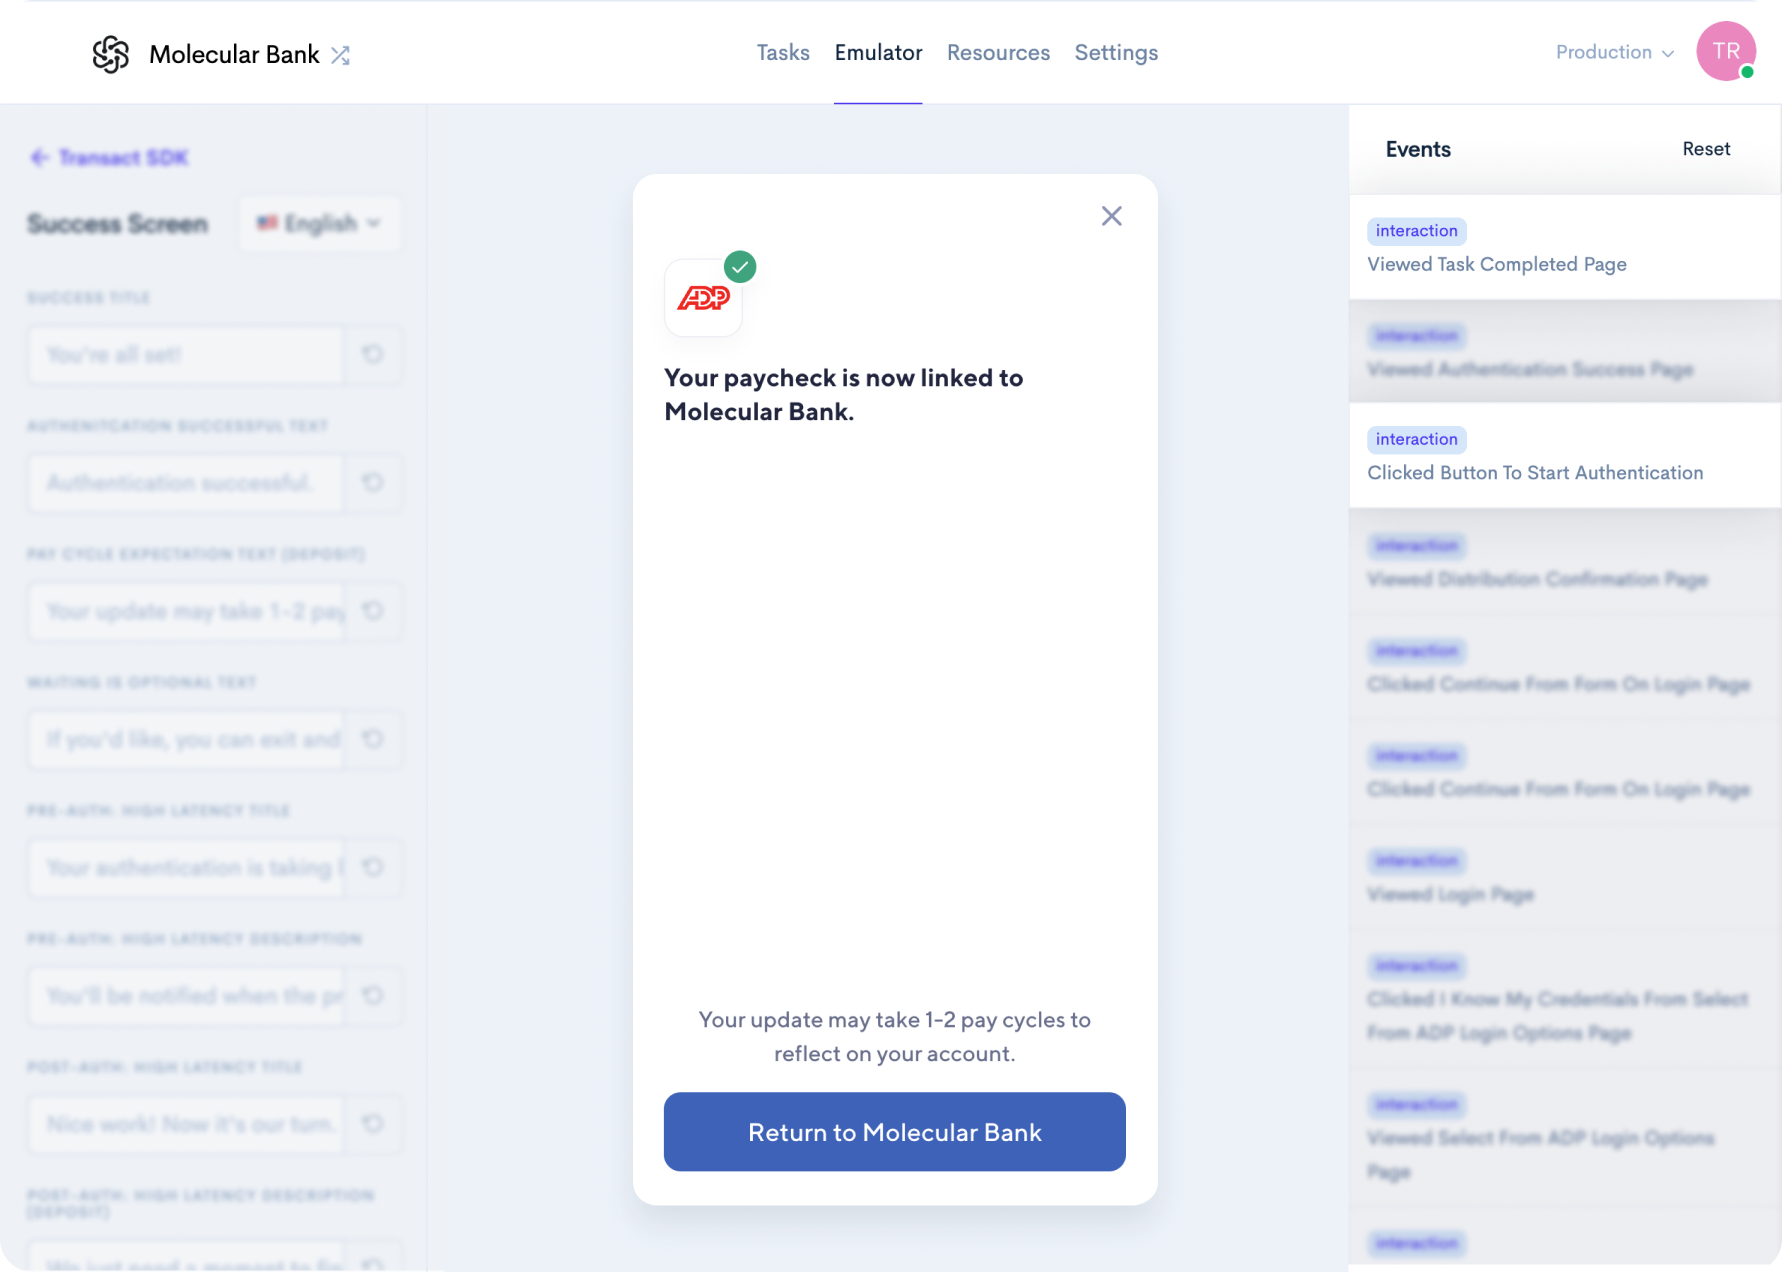
Events list in the Console Emulator
You can see all the interaction events as you navigate through the SDK in the Emulator .

Create your funnel
Now that you have a listener to capture and forward events to your analytics platform, as well as selected the events you'd like to use to create the funnel, it's time to build the funnel.
Go into your analytics platform and create a new blank funnel. Select the events in the order by which your users will encounter them as they progress through the Atomic flow. This will enable you to see the percentages of users who reach each stage in the journey.
By analyzing this data you can see the percentages of users who achieve each stage in the flow. Using this knowledge you can optimize your usage of Atomic.
Further reading
You made it! At this point, you should have a working funnel that captures the most important points in the user journey from launching Transact to successful task completion. Since your listener is configured to capture all of the interaction events emitted from Transact, the sky's the limit for what you can build in your analytics platform.
Its worth noting that to truly measure your overall conversion, you will need to capture data from webhooks in addition to the events emitted by Transact. This will give you visibility into events which occur outside the scope of the Transact events.
For next steps, we recommend building out webhooks to round out your insights into the events that occur after Transact comes to completion.
